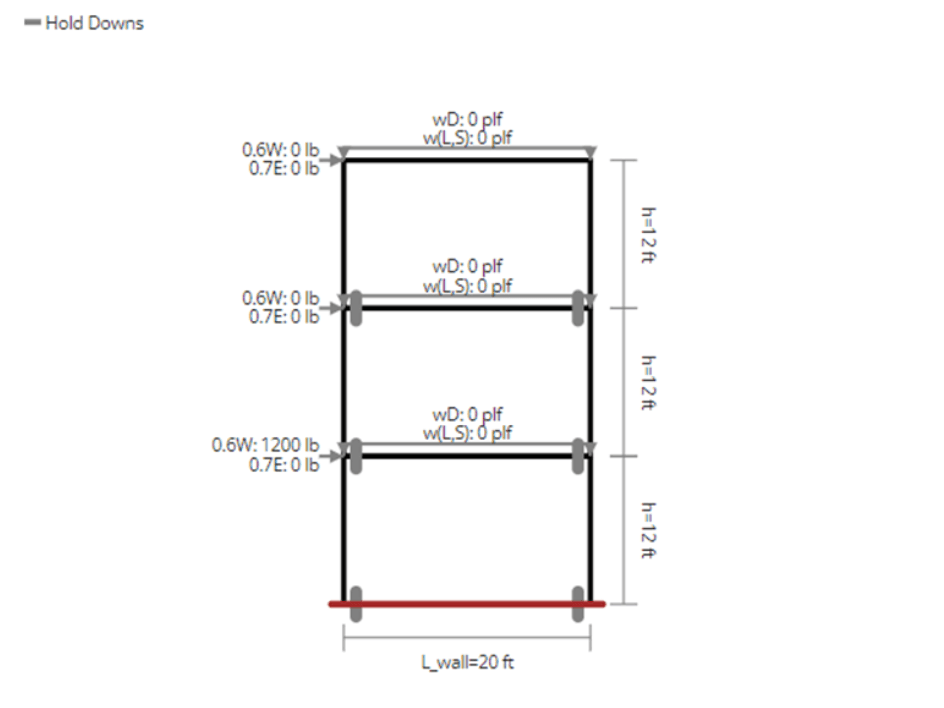
Update: Multi-story shear walls now supported!

The shear wall calculator can now design multiple story shear walls by simply changing the input for the number of stories. All openings are designed as identical on each floor and the rest of the inputs are the same as designing a single-story shear wall. Loads can be applied to any separate story and the loads will be compounded if it’s the same type of load on the same story. Loads can be connected to a diaphragm analysis as well. Swapping to “Detailed” mode, will show you which story governs the design. A video walkthrough can be found here.
Background
The ClearCalcs Wood Shear Wall (ASD) calculator allows users to design shear walls by specifying the lateral loads and properties of the wall. This calculator checks allowable wind shear capacity and allowable chord tension and compression forces. In this article, the key sections of the calculator will be explained. If you’d prefer to learn by watching a video overview on single-storey shear wall, check out the video here.
The Shear Wall Calculator has 3 main sections 1. Key Properties 2. Loads 3. Summary
Key Properties
Sheathing and Nail Pattern
In ClearCalcs, you can select your sheathing thickness for OSB/Plywood and nail pattern to choose the nail diameter and spacing. The sheathing, along with the nails & spacing, are what govern the shear capacity of the wall. A thicker sheathing and/or tighter nail spacing can dramatically increase the total capacity.

Chord Design

To design the chords in the shear wall calculator, specify the stud size and grade using the member selector. The studs other than the chords generally don’t need to be designed for shear wall design, however their specific density does have a significant impact on the shear resistance of the wall, which varies depending on the stud species.
The stud spacing within the shear wall also significantly affects deflection calculations, and the shear capacity for unblocked shear walls. The standards set a limit on stud spacing of 24 inches for wood structural panels.
Next, you can set the number of stud plies in chords. This can make the chords stronger by increasing their size or by adding more plies to share the compressive and tensile loads.
Lastly, set the largest hole size in the chords that will typically be used to fasten hold-down anchors. These holes reduce the tensile strength of the chord and must thus be accounted for.
Wall Geometry

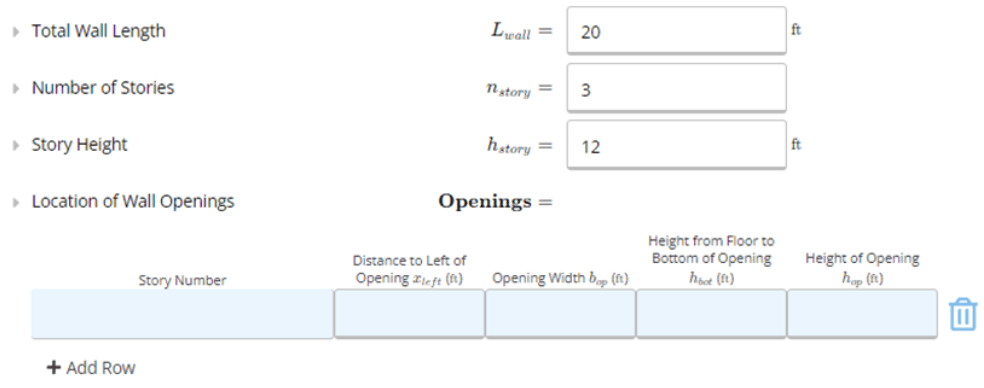
In these inputs, the length of the wall, number of stories and story height can be set. If the wall you are designing has any openings, you can enter the dimensions in the table. Simply specify the distance of the opening measured from the left and bottom of the wall, as well as the size of the opening. The segmented panel approach is used, so shear panels will be created based on the distance between openings. The wall areas under and above openings are not considered in the segmented method.
Loads

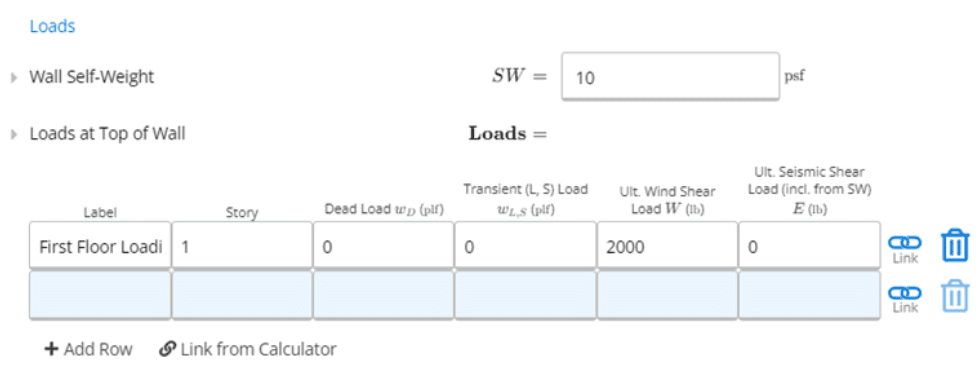
The wall self-weight is the weight of the sheathed wall. Any additional loads can be specified in the “Loads at Top of Wall” table. Loads should be entered at the ULTIMATE level - these will be factored down per the building code requirements (e.g. 0.6D + 0.6W). For seismic loads, the seismic loads from self-weight of the wall should also be included in the total load!
Summary

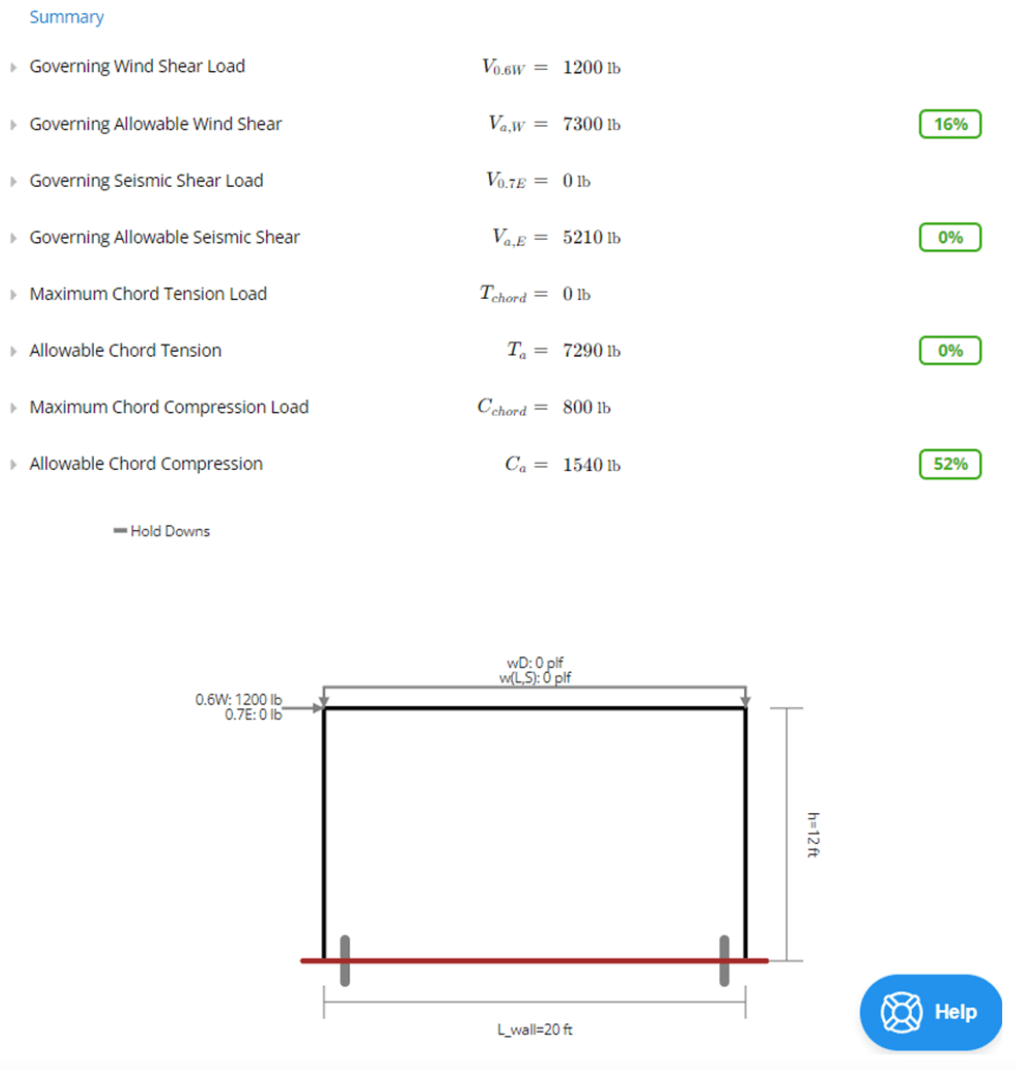
In this Summary section, ClearCalcs is looking at your utilization percentages (i.e., load demand divided by allowable capacity) for Wind Shear, Seismic Shear, Chord Tension and Chord Compression. Note that the green, yellow, and/or red utilization percentages will always be based on the worst-case (governing) load combination that your shear wall will need to withstand.
Currently, this calculator only supports gravity and lateral loads. This focuses on chord tensions and strengths, as well as overturning on the wall rather than load transferring on the system. Hold downs are assumed to transfer loads properly, so additional analysis should be completed separately to ensure the design works.

.png)
