The ClearCalcs Concrete Column Calculator allows users to design concrete columns by specifying the desired load cases and dimensions of the column. In this article, each section of the calculator will be explained plus followed by a few worked examples.
The Column Calculator has 5 main sections:
1. Key Properties.
2. Longitudinal Reinforcement.
3. Fitment Reinforcement.
4. Loads.
5. Summary and Graphs.
1. Key Properties
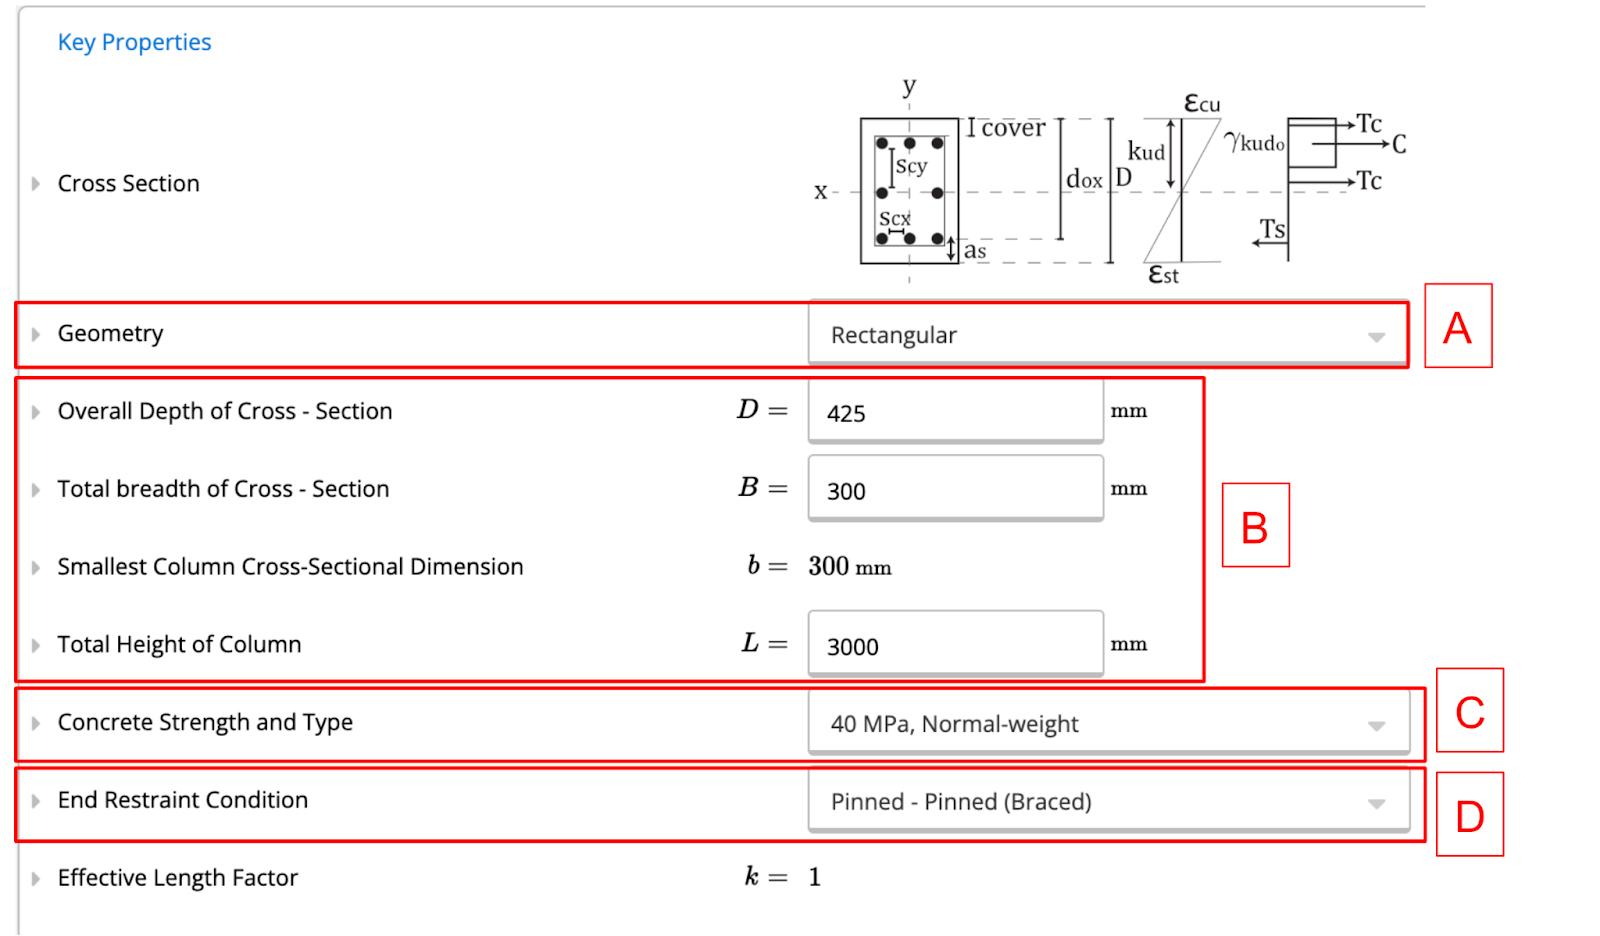
A. Geometry
ClearCalcs gives the user the opportunity to use either a rectangular or a circular column.

B. Beam Dimensions
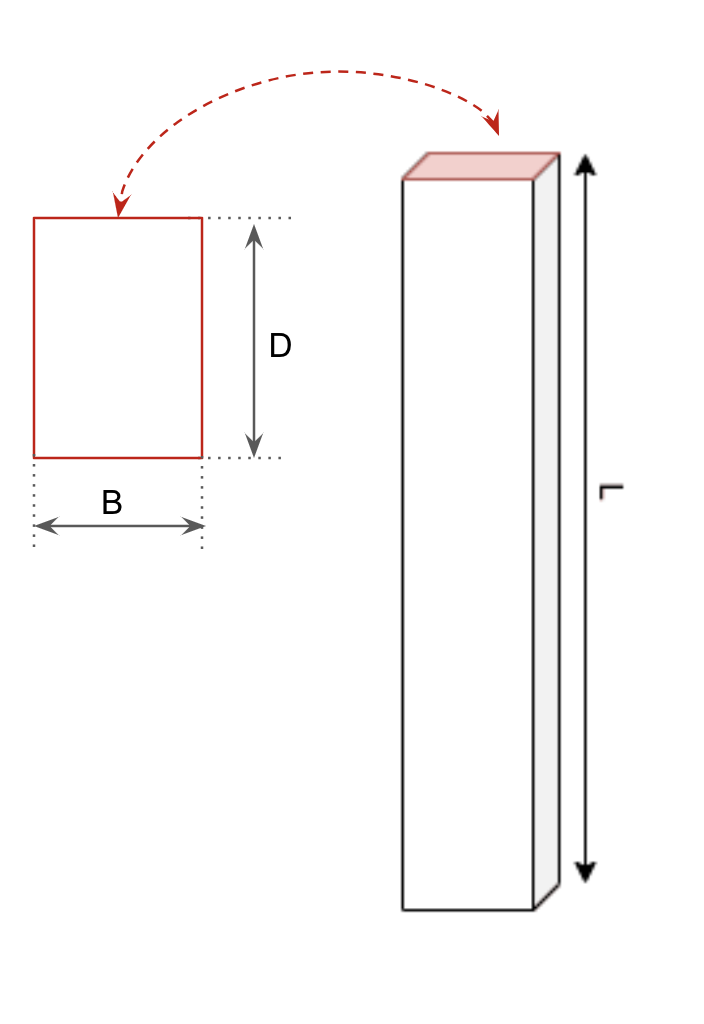
The figure given below illustrates the three parameters that need to be specified in this section.
- Cross-section height (D) must be specified in millimeters.
- Cross-section width (B) must be specified in millimeters.
- Total length of the column (L) must be specified in millimeters.
C. Concrete Strength
You can select the concrete strength from the drop-down menu below. All options are presented in Mega Pascals and have normal weight classification.

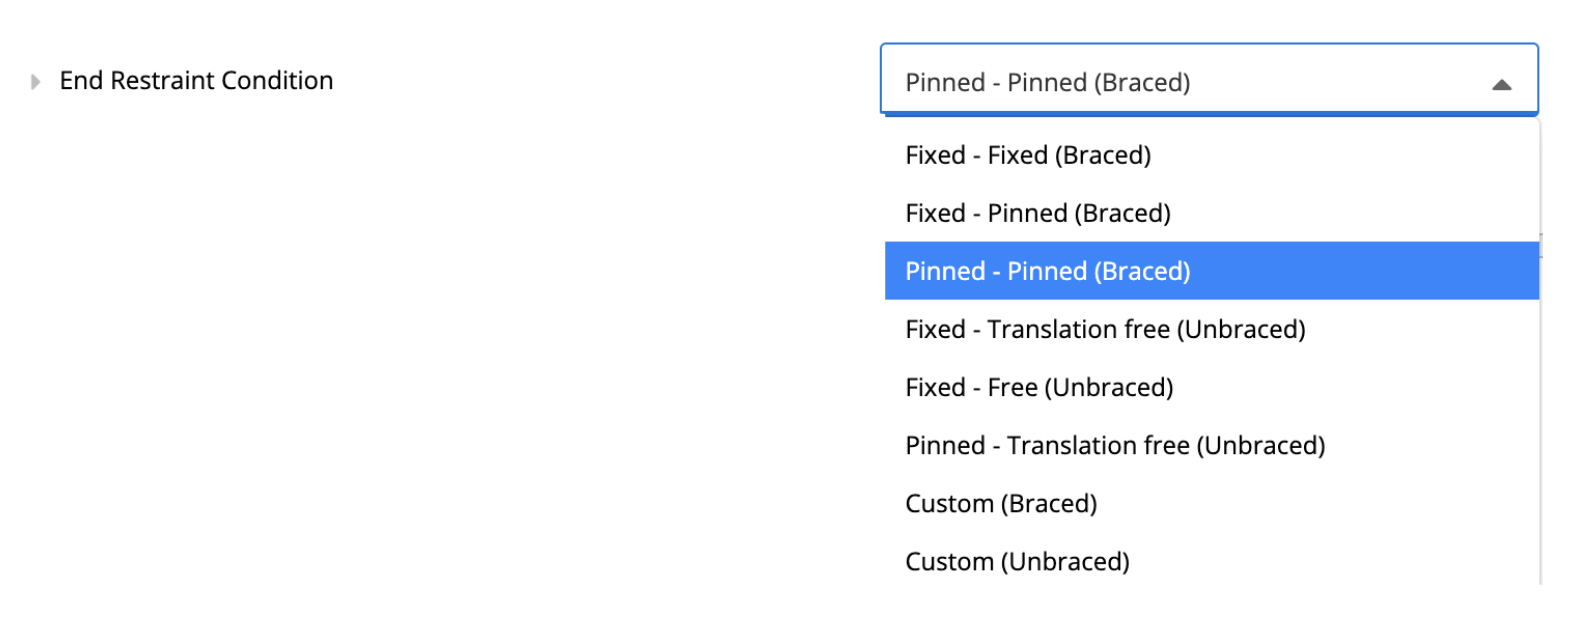
D. End Restraint Condition
You can select the end restraint condition from the drop-down menu below.
2. Longitudinal Reinforcement

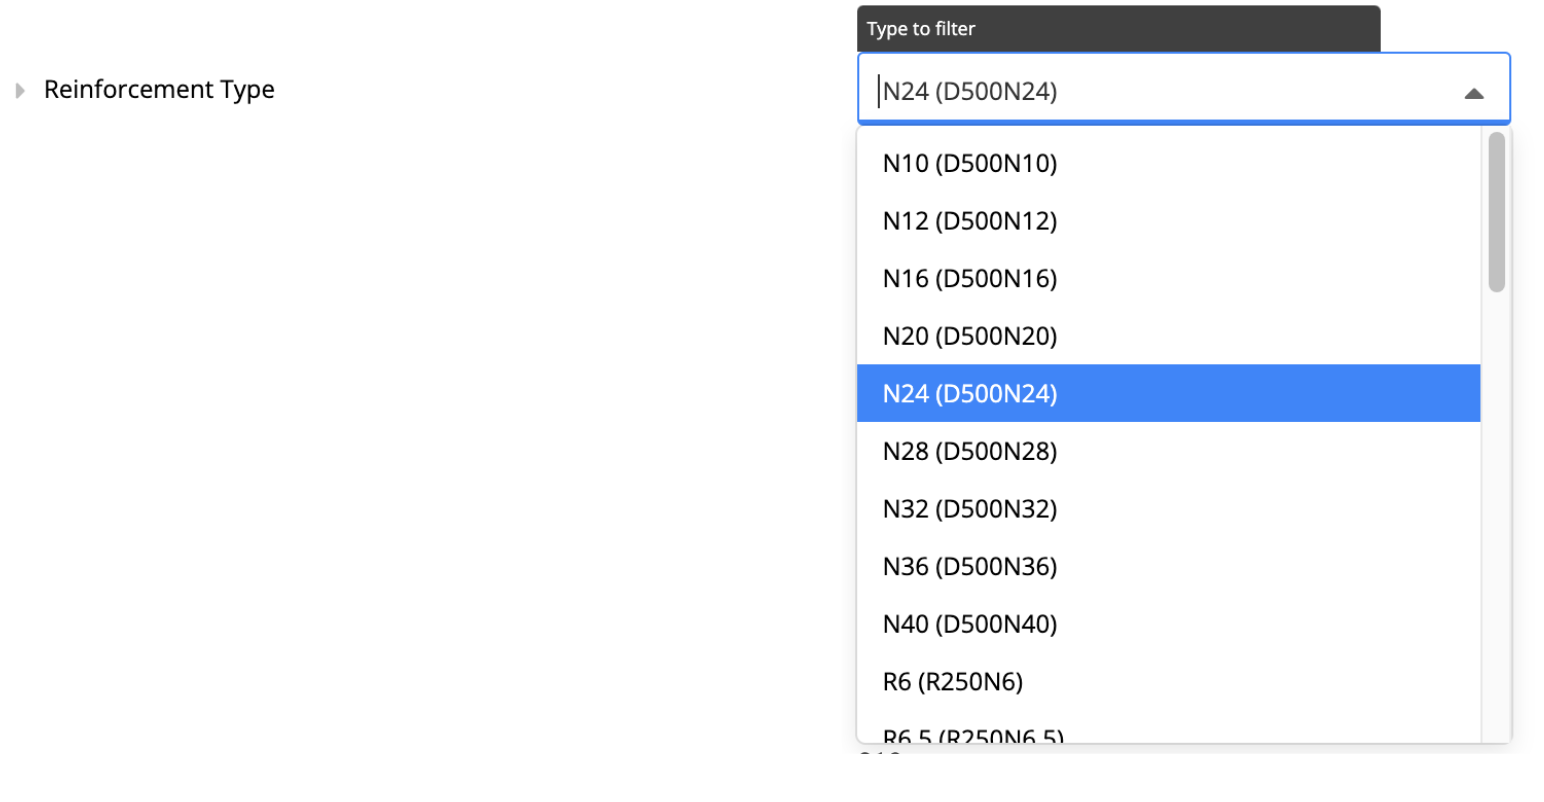
A. Reinforcement Type
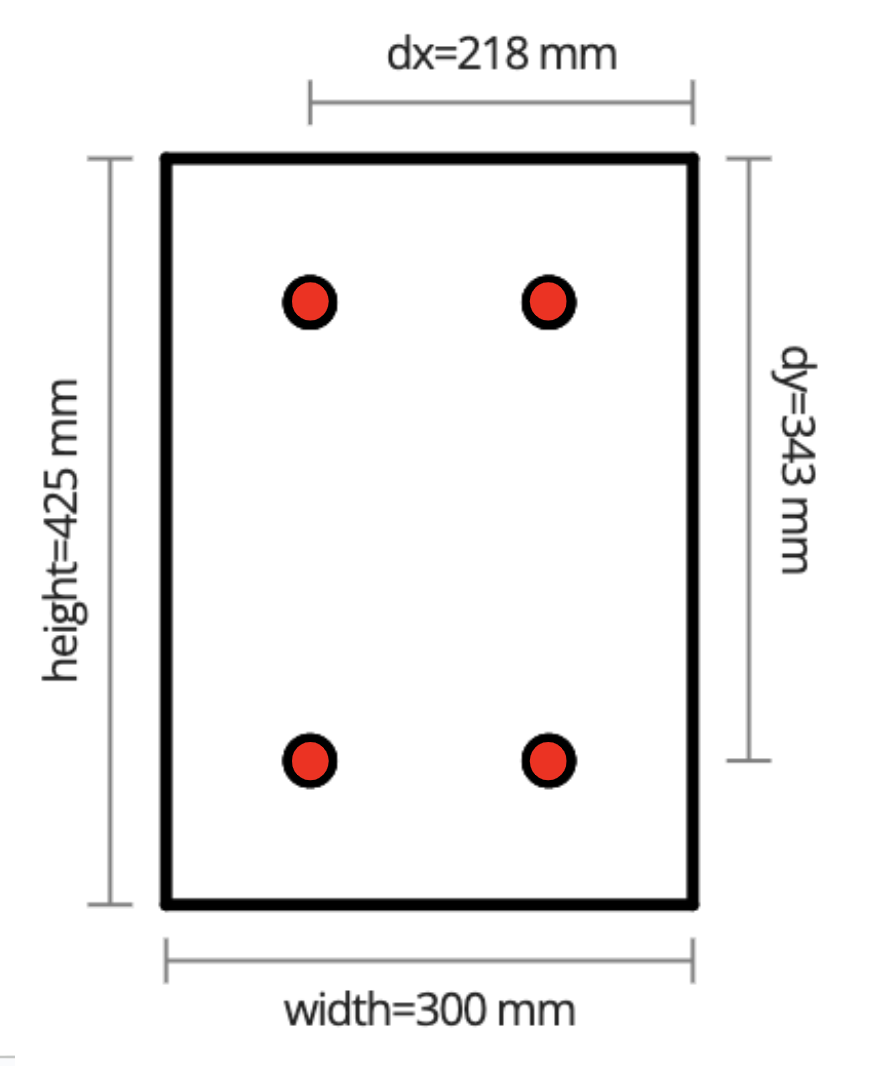
You can choose the type of reinforcement for the column shown in the graphic in red, by selecting an option from the drop-down menu.
B. Additional Top / Bottom Reinforcement Bars (per side)
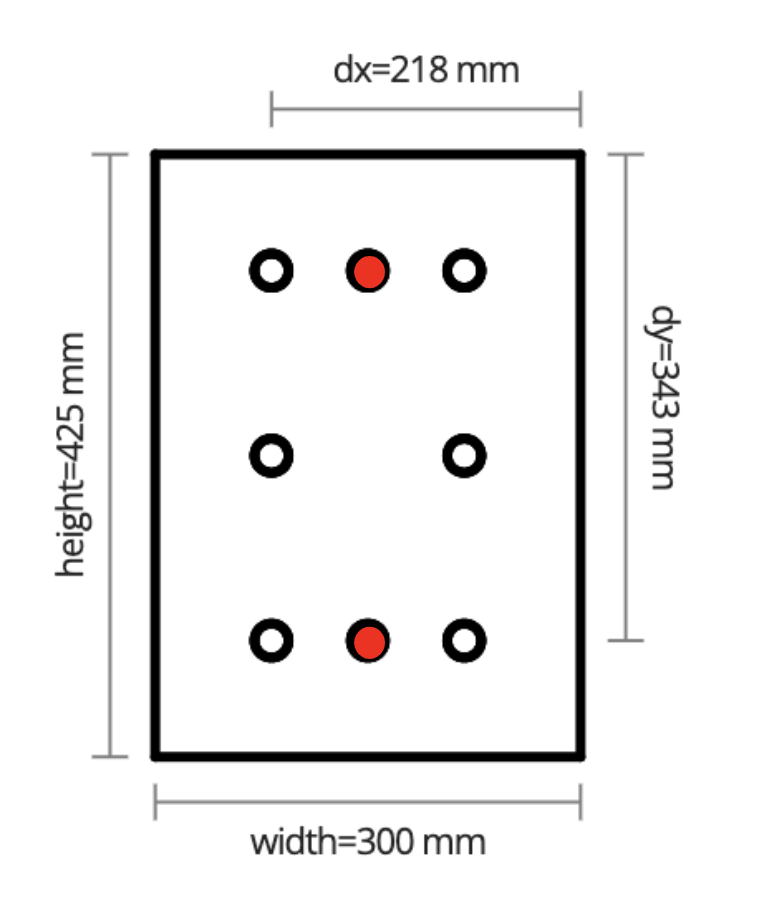
You can choose how many bars to add to the column to the top and bottom sides of the column, as illustrated in the graphic below in red, by entering the desired number of bars.

C. Additional Left / Right Reinforcement Bars (per side)
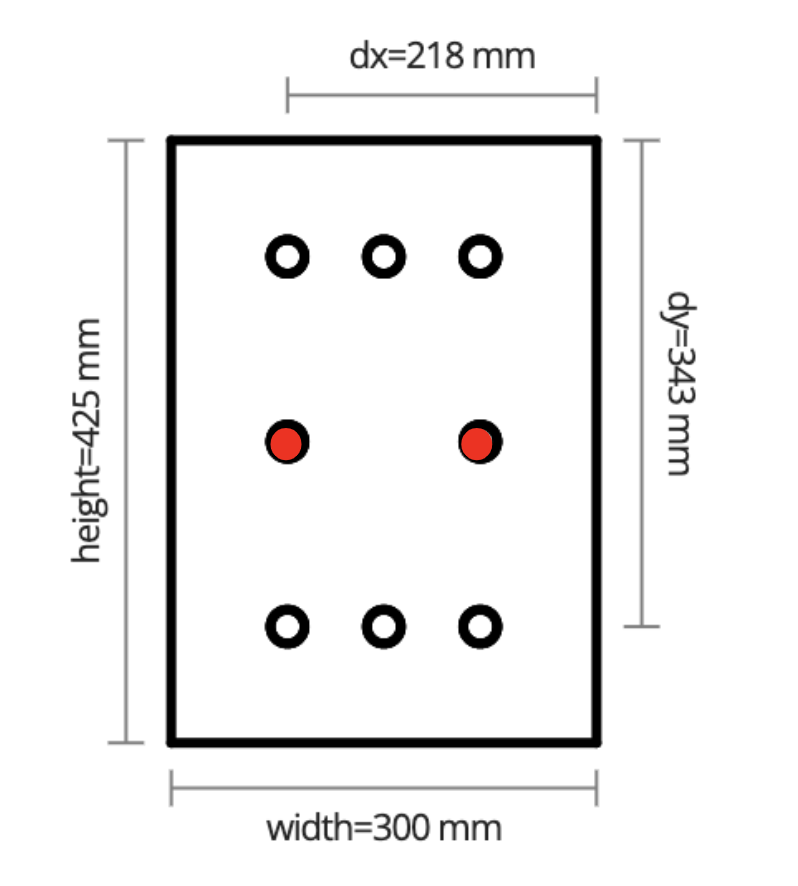
You can choose how many bars to add to the column to the left and right sides of the column, as illustrated in the graphic below in red, by entering the desired number of bars.

D. Concrete Cover to Fitments
Distance from concrete surface to ties. While concrete cover must in all cases be at least 20mm, the minimum cover requirement is often greater. See AS 3600:2018 - 2018, Cl 4.10 for specific requirements of minimum cover based upon exposure classification, concrete characteristic strength, and other factors .
3. Fitment Reinforcement
The widget helps determine the configuration of fitment (stirrups or ties) reinforcement in concrete columns.
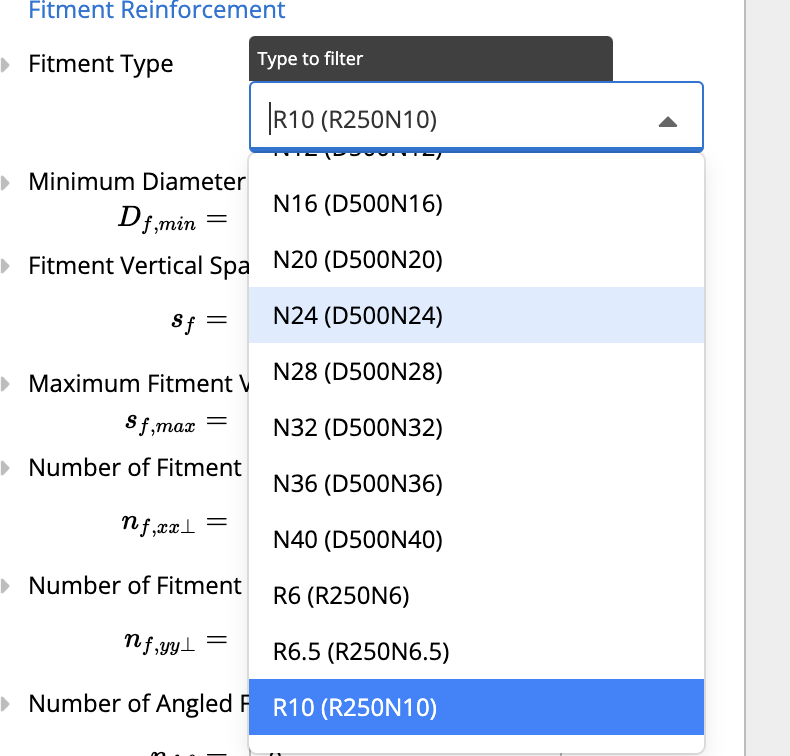
A. Fitment Type
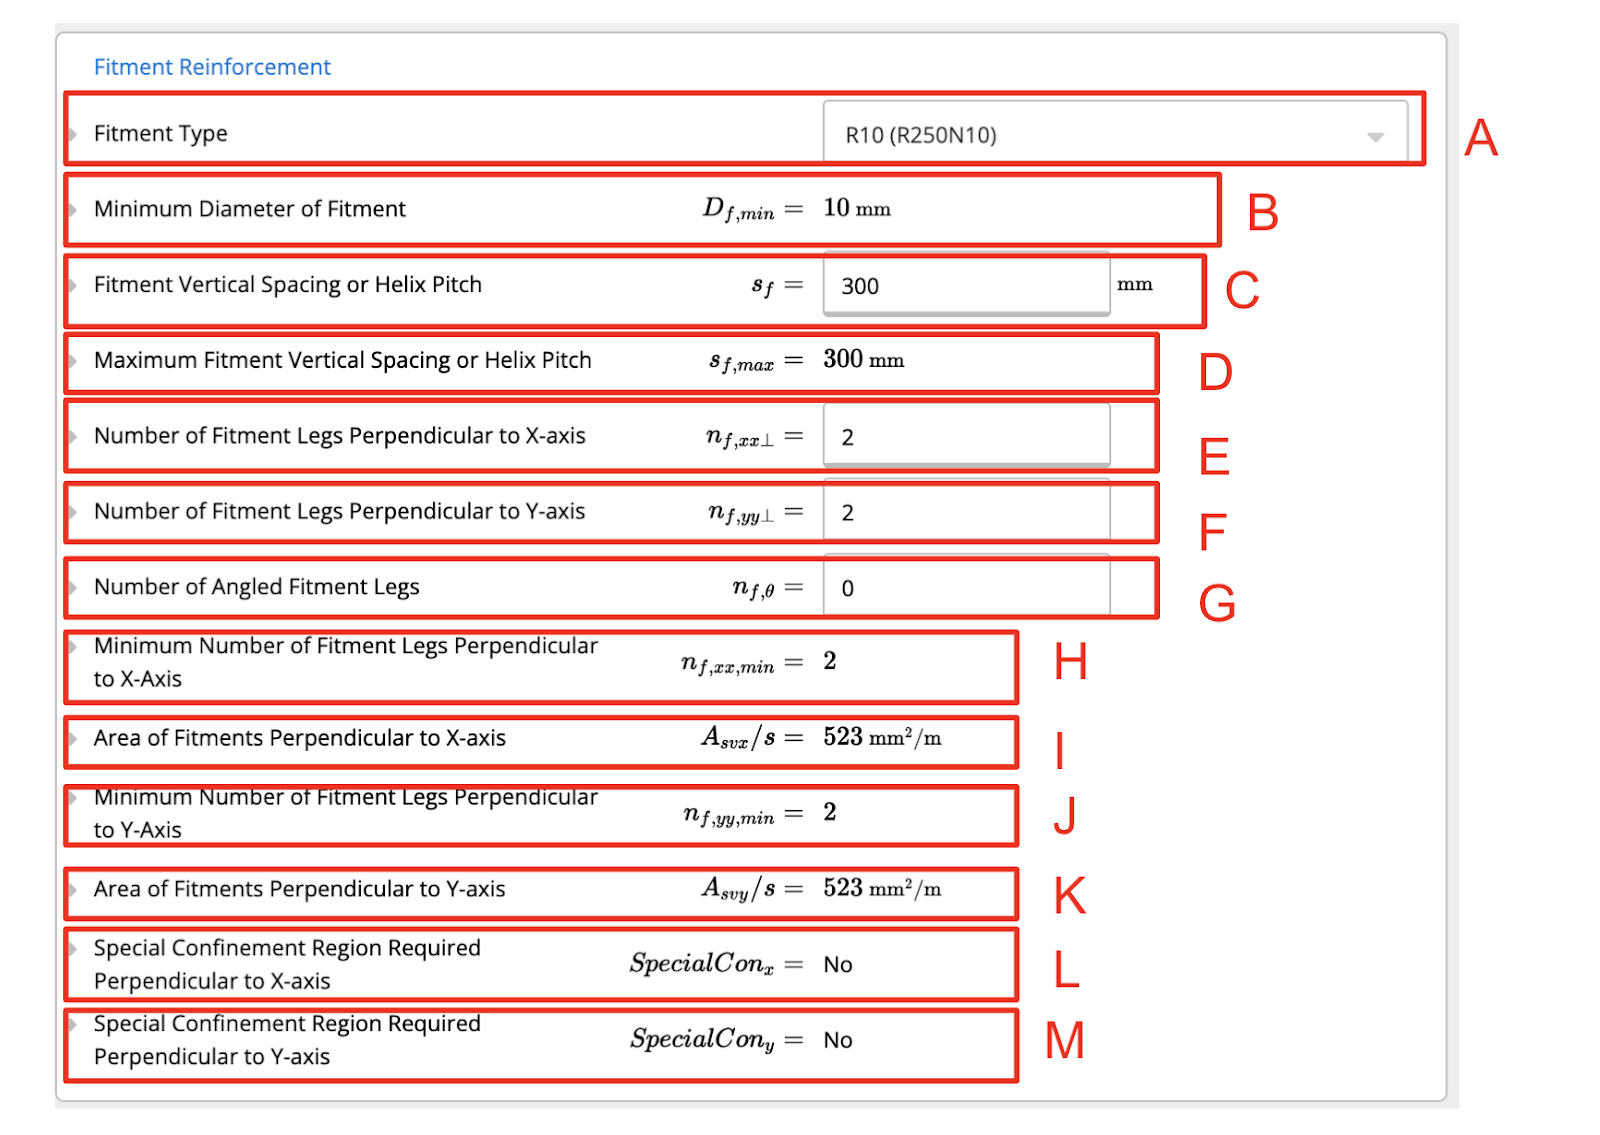
You can choose the type of fitment reinforcement for the column, as illustrated in the graphic below, by selecting an option from the drop-down menu.
B. Minimum Diameter of Fitment:
This is the minimum diameter of the fitment reinforcement bars in millimeters (mm). The minimum is typically determined based on structural requirements and code provisions.
C. Fitment Vertical Spacing or Helix Pitch:
This field specifies the actual spacing or pitch (vertical distance) between each fitment reinforcement (ties or spirals) in millimeters (mm).
D. Maximum Fitment Vertical Spacing or Helix Pitch:
This represents the maximum allowed vertical spacing between fitments, specified by AS 3600:2018 to ensure the required confinement.
E. Number of Fitment Legs Perpendicular to X-axis:
This is the number of fitment legs (ties) that are placed perpendicular to the X-axis of the column's cross-section. In this case.
F. Number of Fitment Legs Perpendicular to Y-axis:
This input defines the number of fitment legs perpendicular to the Y-axis.
G. Number of Angled Fitment Legs:
This input specifies the number of angled or diagonal fitment legs.
H. Minimum Number of Fitment Legs Perpendicular to X-axis:
This shows the minimum number of required fitment legs in the X-axis direction as per the standard.
I. Area of Fitments Perpendicular to X-axis:
This field displays the area of reinforcement (in square millimeters per meter) provided by the fitment legs perpendicular to the X-axis.
J. Minimum Number of Fitment Legs Perpendicular to Y-axis:
Similar to the minimum number of legs in the X-axis direction, this shows the minimum required fitment legs in the Y-axis.
K. Area of Fitments Perpendicular to Y-axis:
This shows the area of reinforcement provided by fitment legs perpendicular to the Y-axis.
L. Special Confinement Region Required Perpendicular to X-axis:
This indicates whether or not a special confinement region (additional reinforcement) is required along the X-axis.
M. Special Confinement Region Required Perpendicular to Y-axis:
Similarly, this indicates whether a special confinement region is needed along the Y-axis.
4. Loads.
In order to enter the loads please go to this link here for more information. https://clearcalcs.com/support/get-started-with-clearcalcs/how-to-enter-loads-patch-point-moment-axial
5. Summary.
In the summary, you can see that a column is safely designed when its demands (axial, shear, and moment) are well within the corresponding capacities, with utilization ratios staying below 100%. High utilization percentages in any area may warrant further analysis or investigation. The summary uses colour-coding to highlight these utilization levels: percentages nearing 100% are shown in yellow as a warning, while values above 100% appear in red, indicating an unsafe condition.
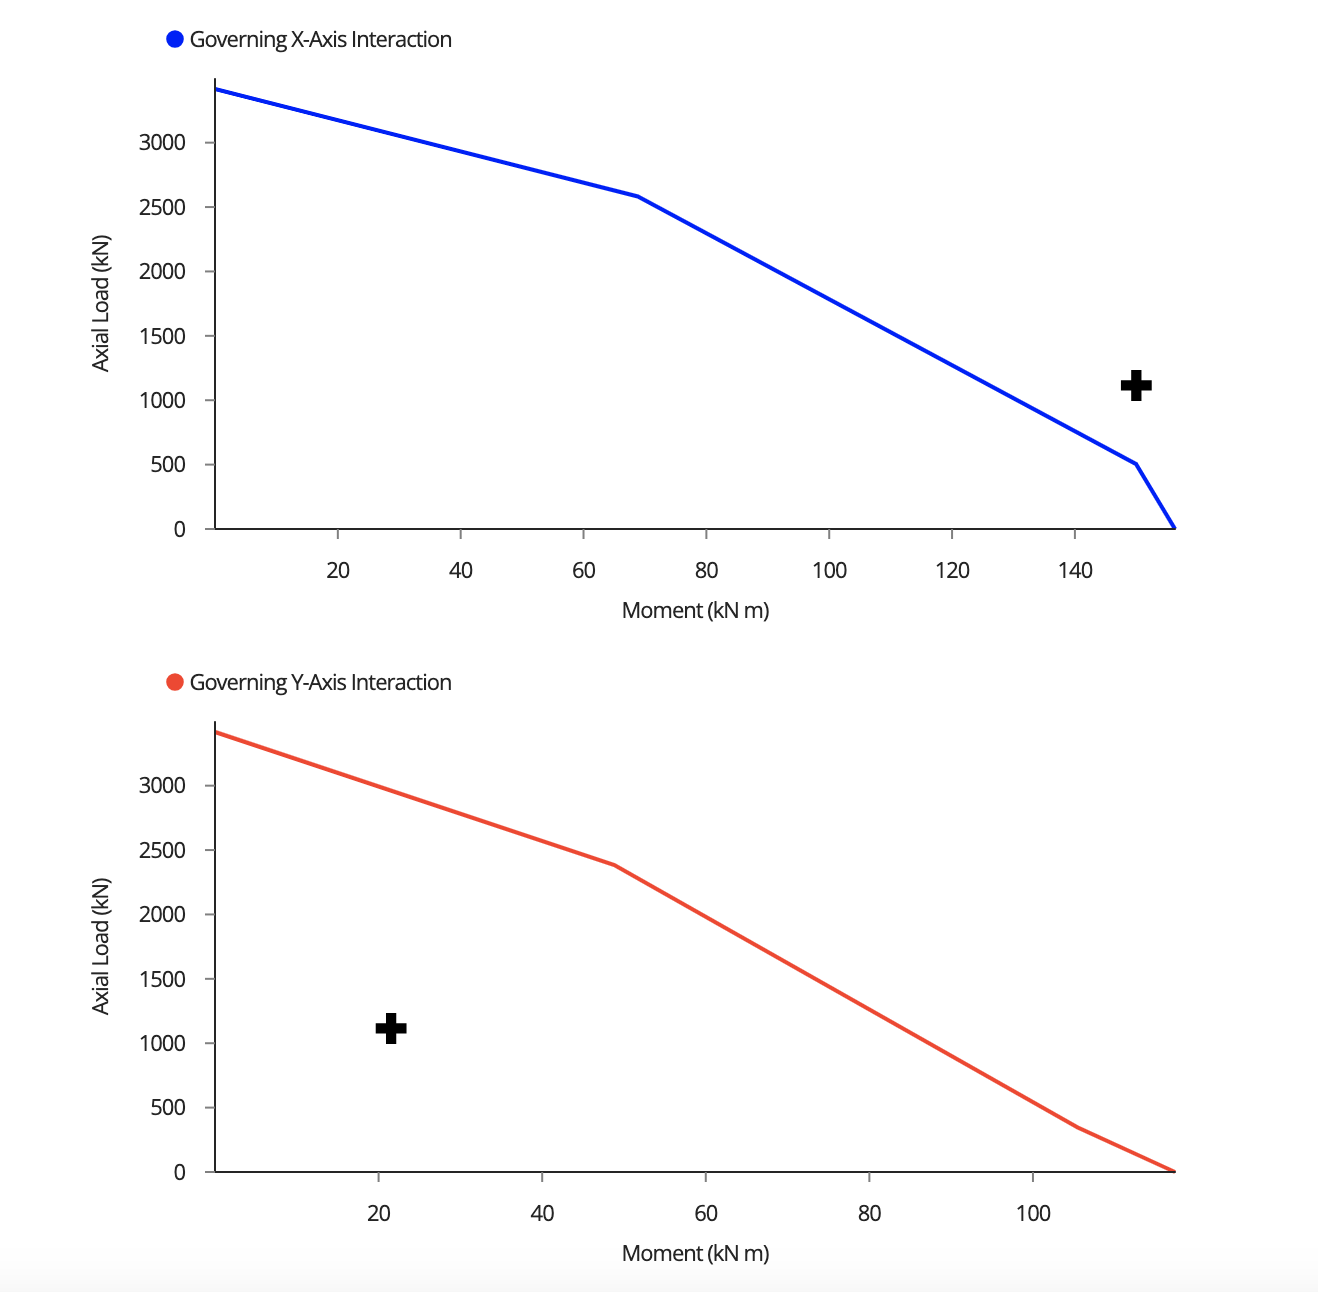
Interaction Curve: Moment and Axial Interaction governing in the x and y axis.
- The curved line on the graphs, known as the interaction curve or interaction diagram, represents the combined capacity of the column for both axial load and bending moment. Any point on this curve shows the maximum combinations of axial load and moment that the column can sustain without failing.
- If the point were on or outside the curve, it would suggest that the column’s load condition is at or exceeds its safe capacity, which would indicate potential structural risk.

.png)
